!
This is a build log. Build logs are detailed and comprehensive project records that contain content from the entire design process such as 3D models, product visualizations, design deep-dives, and much more. It is meant to reflect project progress in the most transparent way possible. Once the project has been completed, a more condensed summary will be available here.
001: Etrio Build Log Launch
January 15, 2023
Welcome to Project 01: Etrio!
The initial idea and motive for this project was to create a functional, simple, and well-balanced mini-ITX chassis with full liquid cooling support. I have always loved the sleek aesthetic of liquid cooled computers, and so I wanted to design a chassis that could accommodate that. Before I dive into the specifics of this project, let's have a look at some visuals!
01
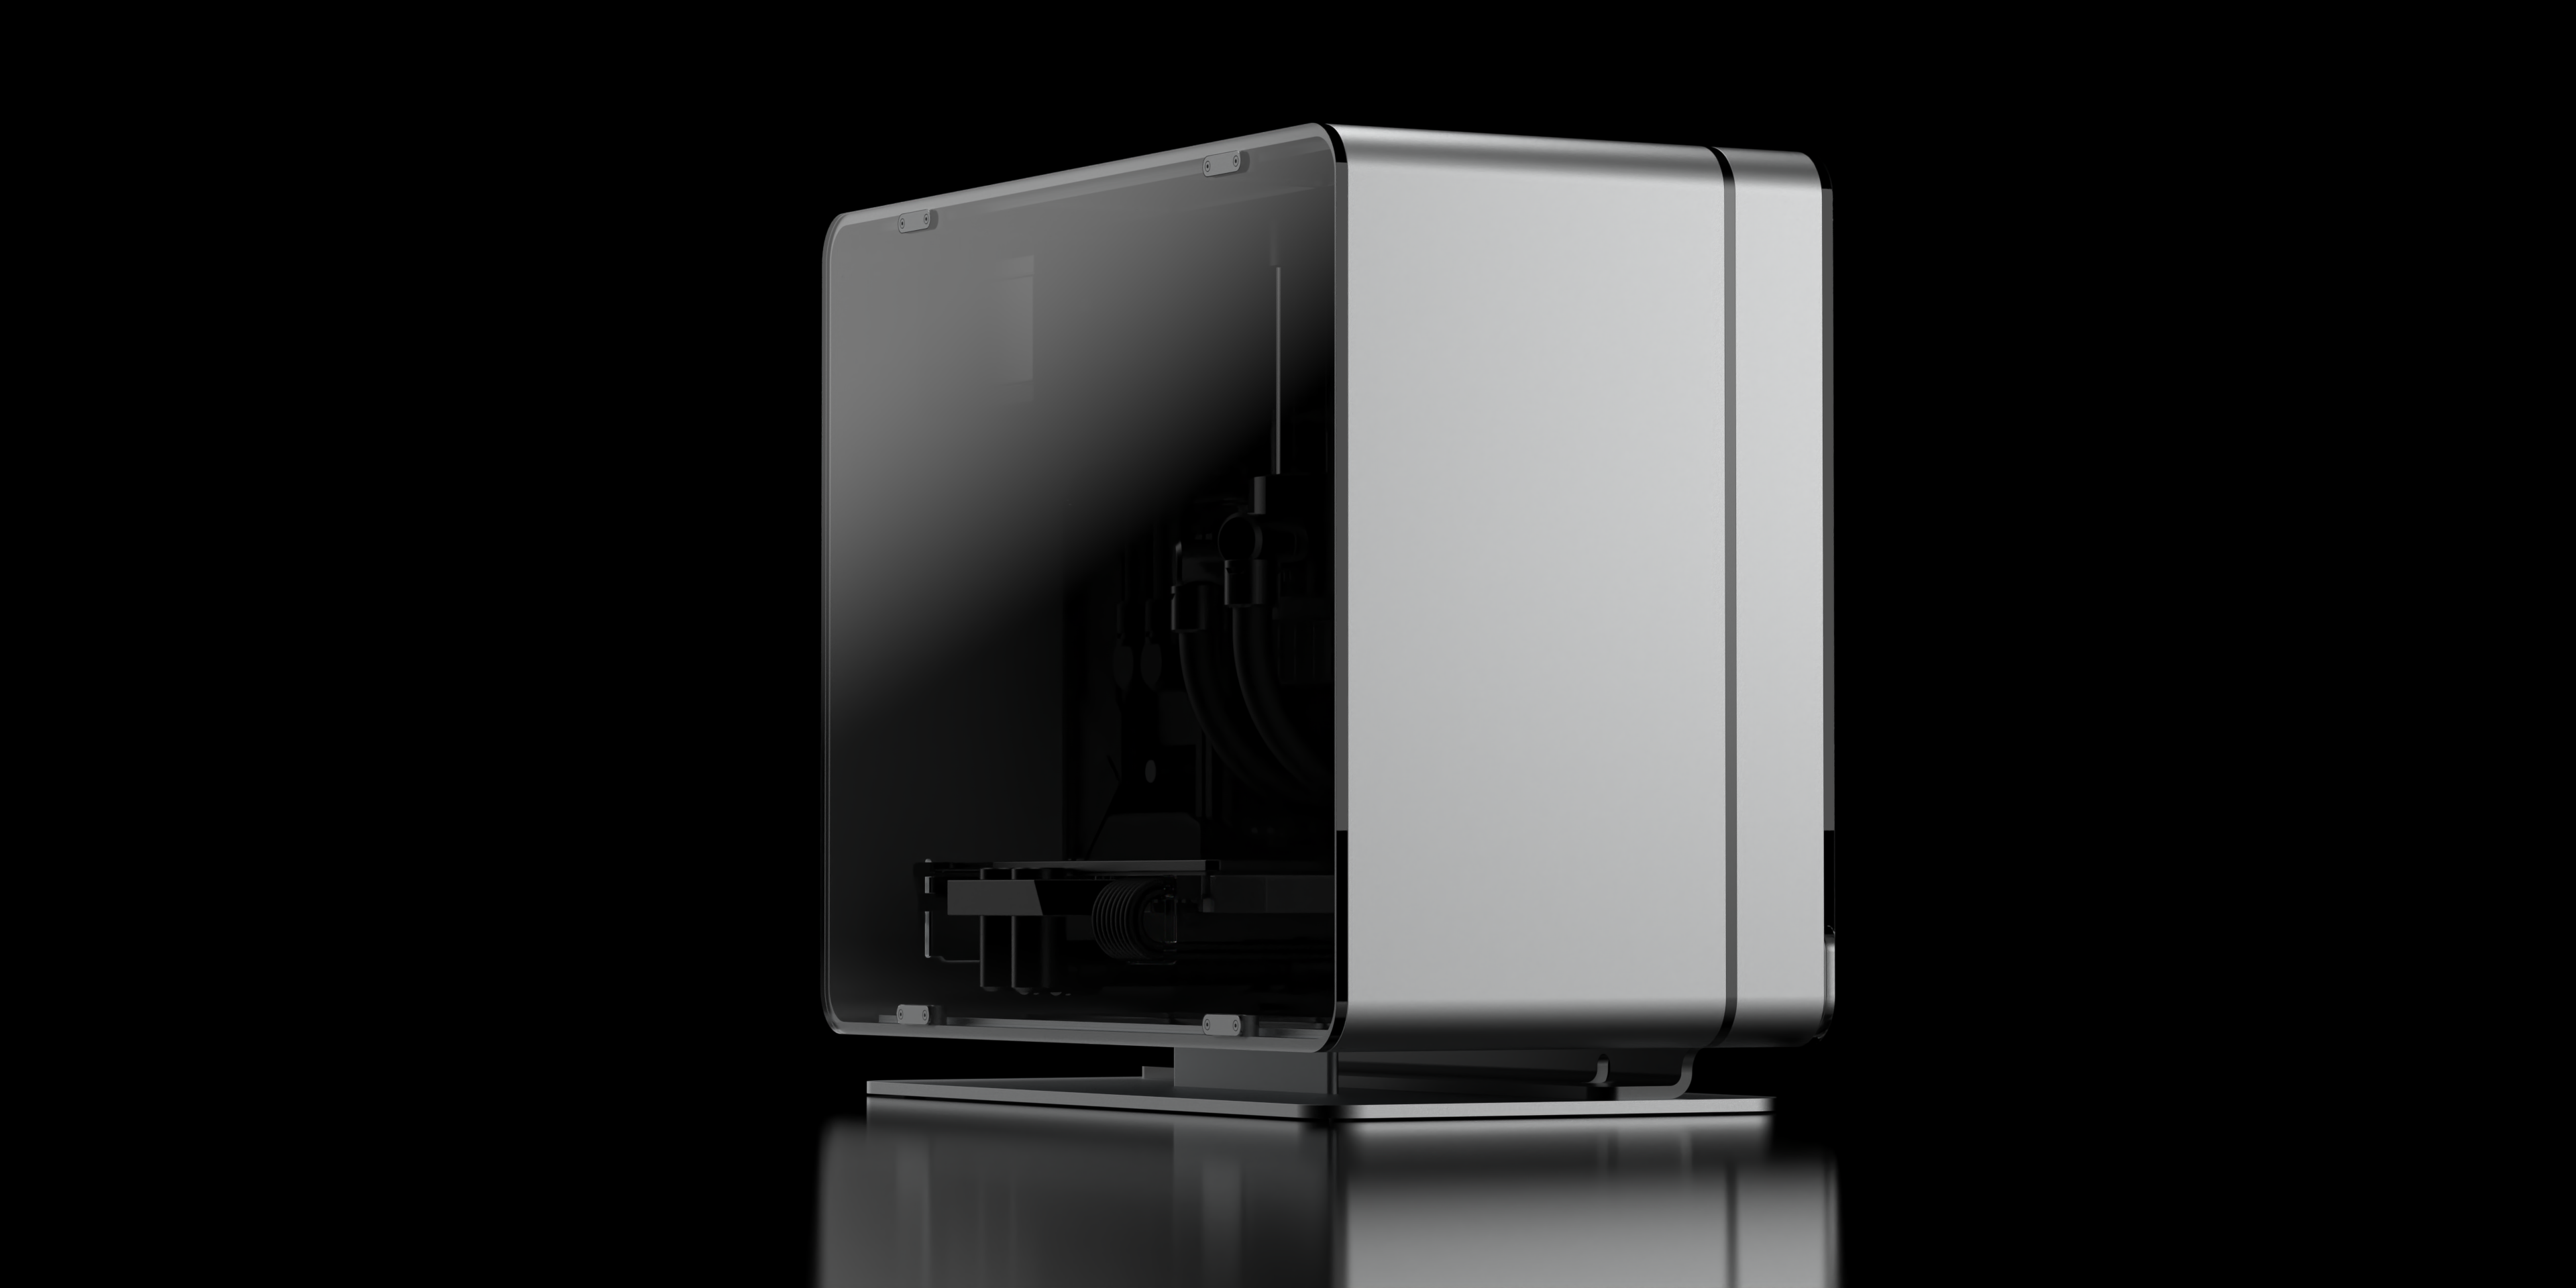
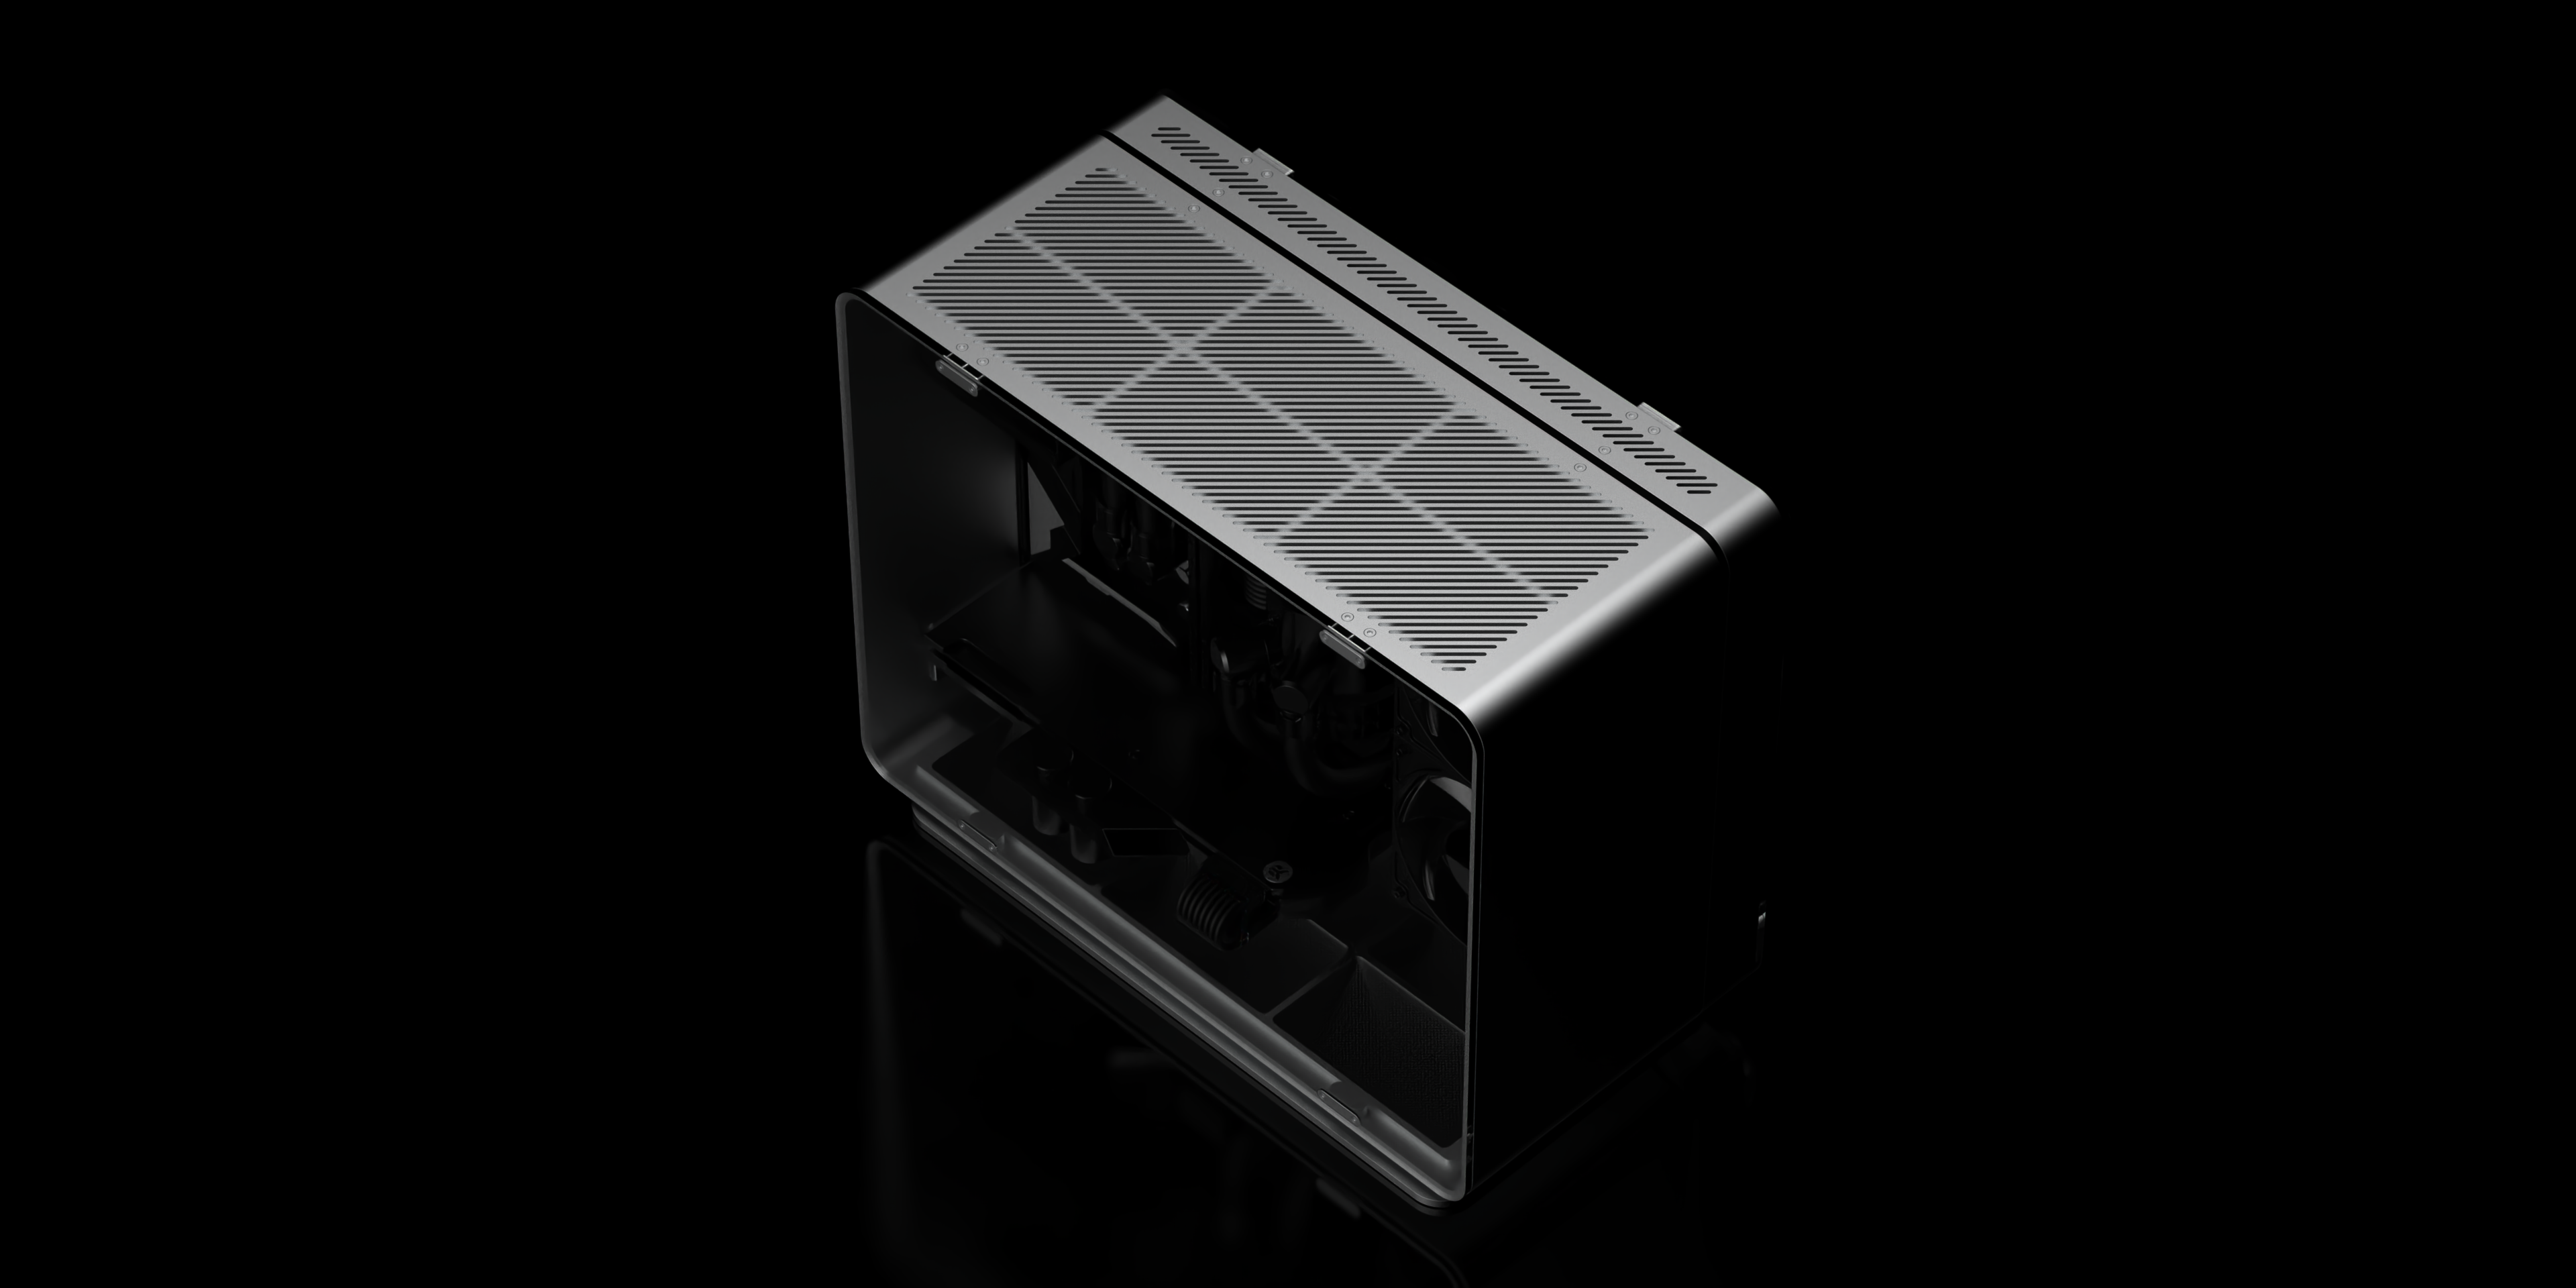
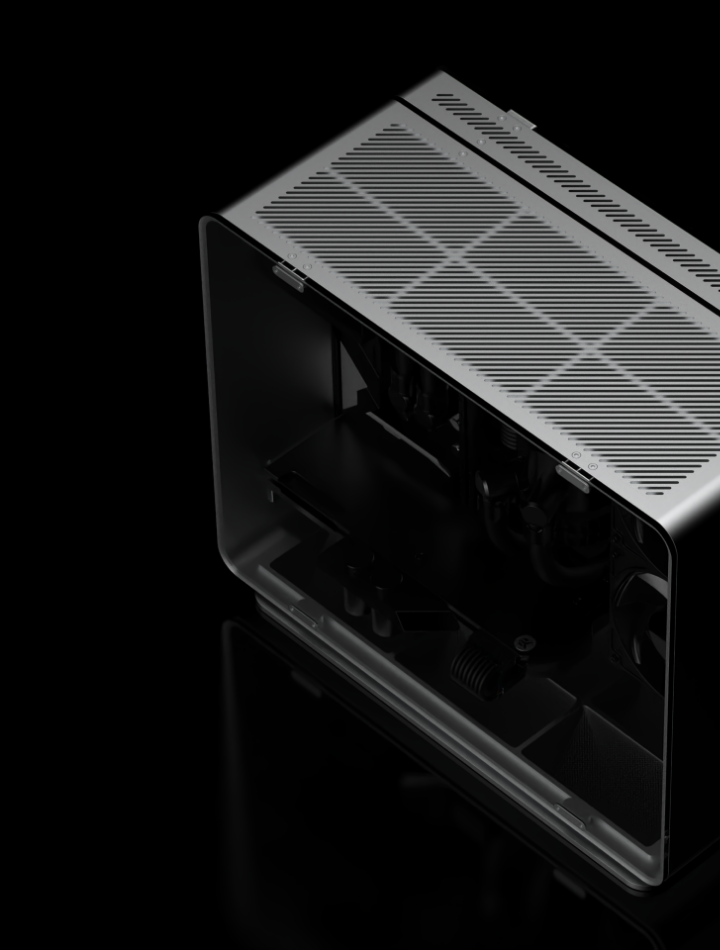
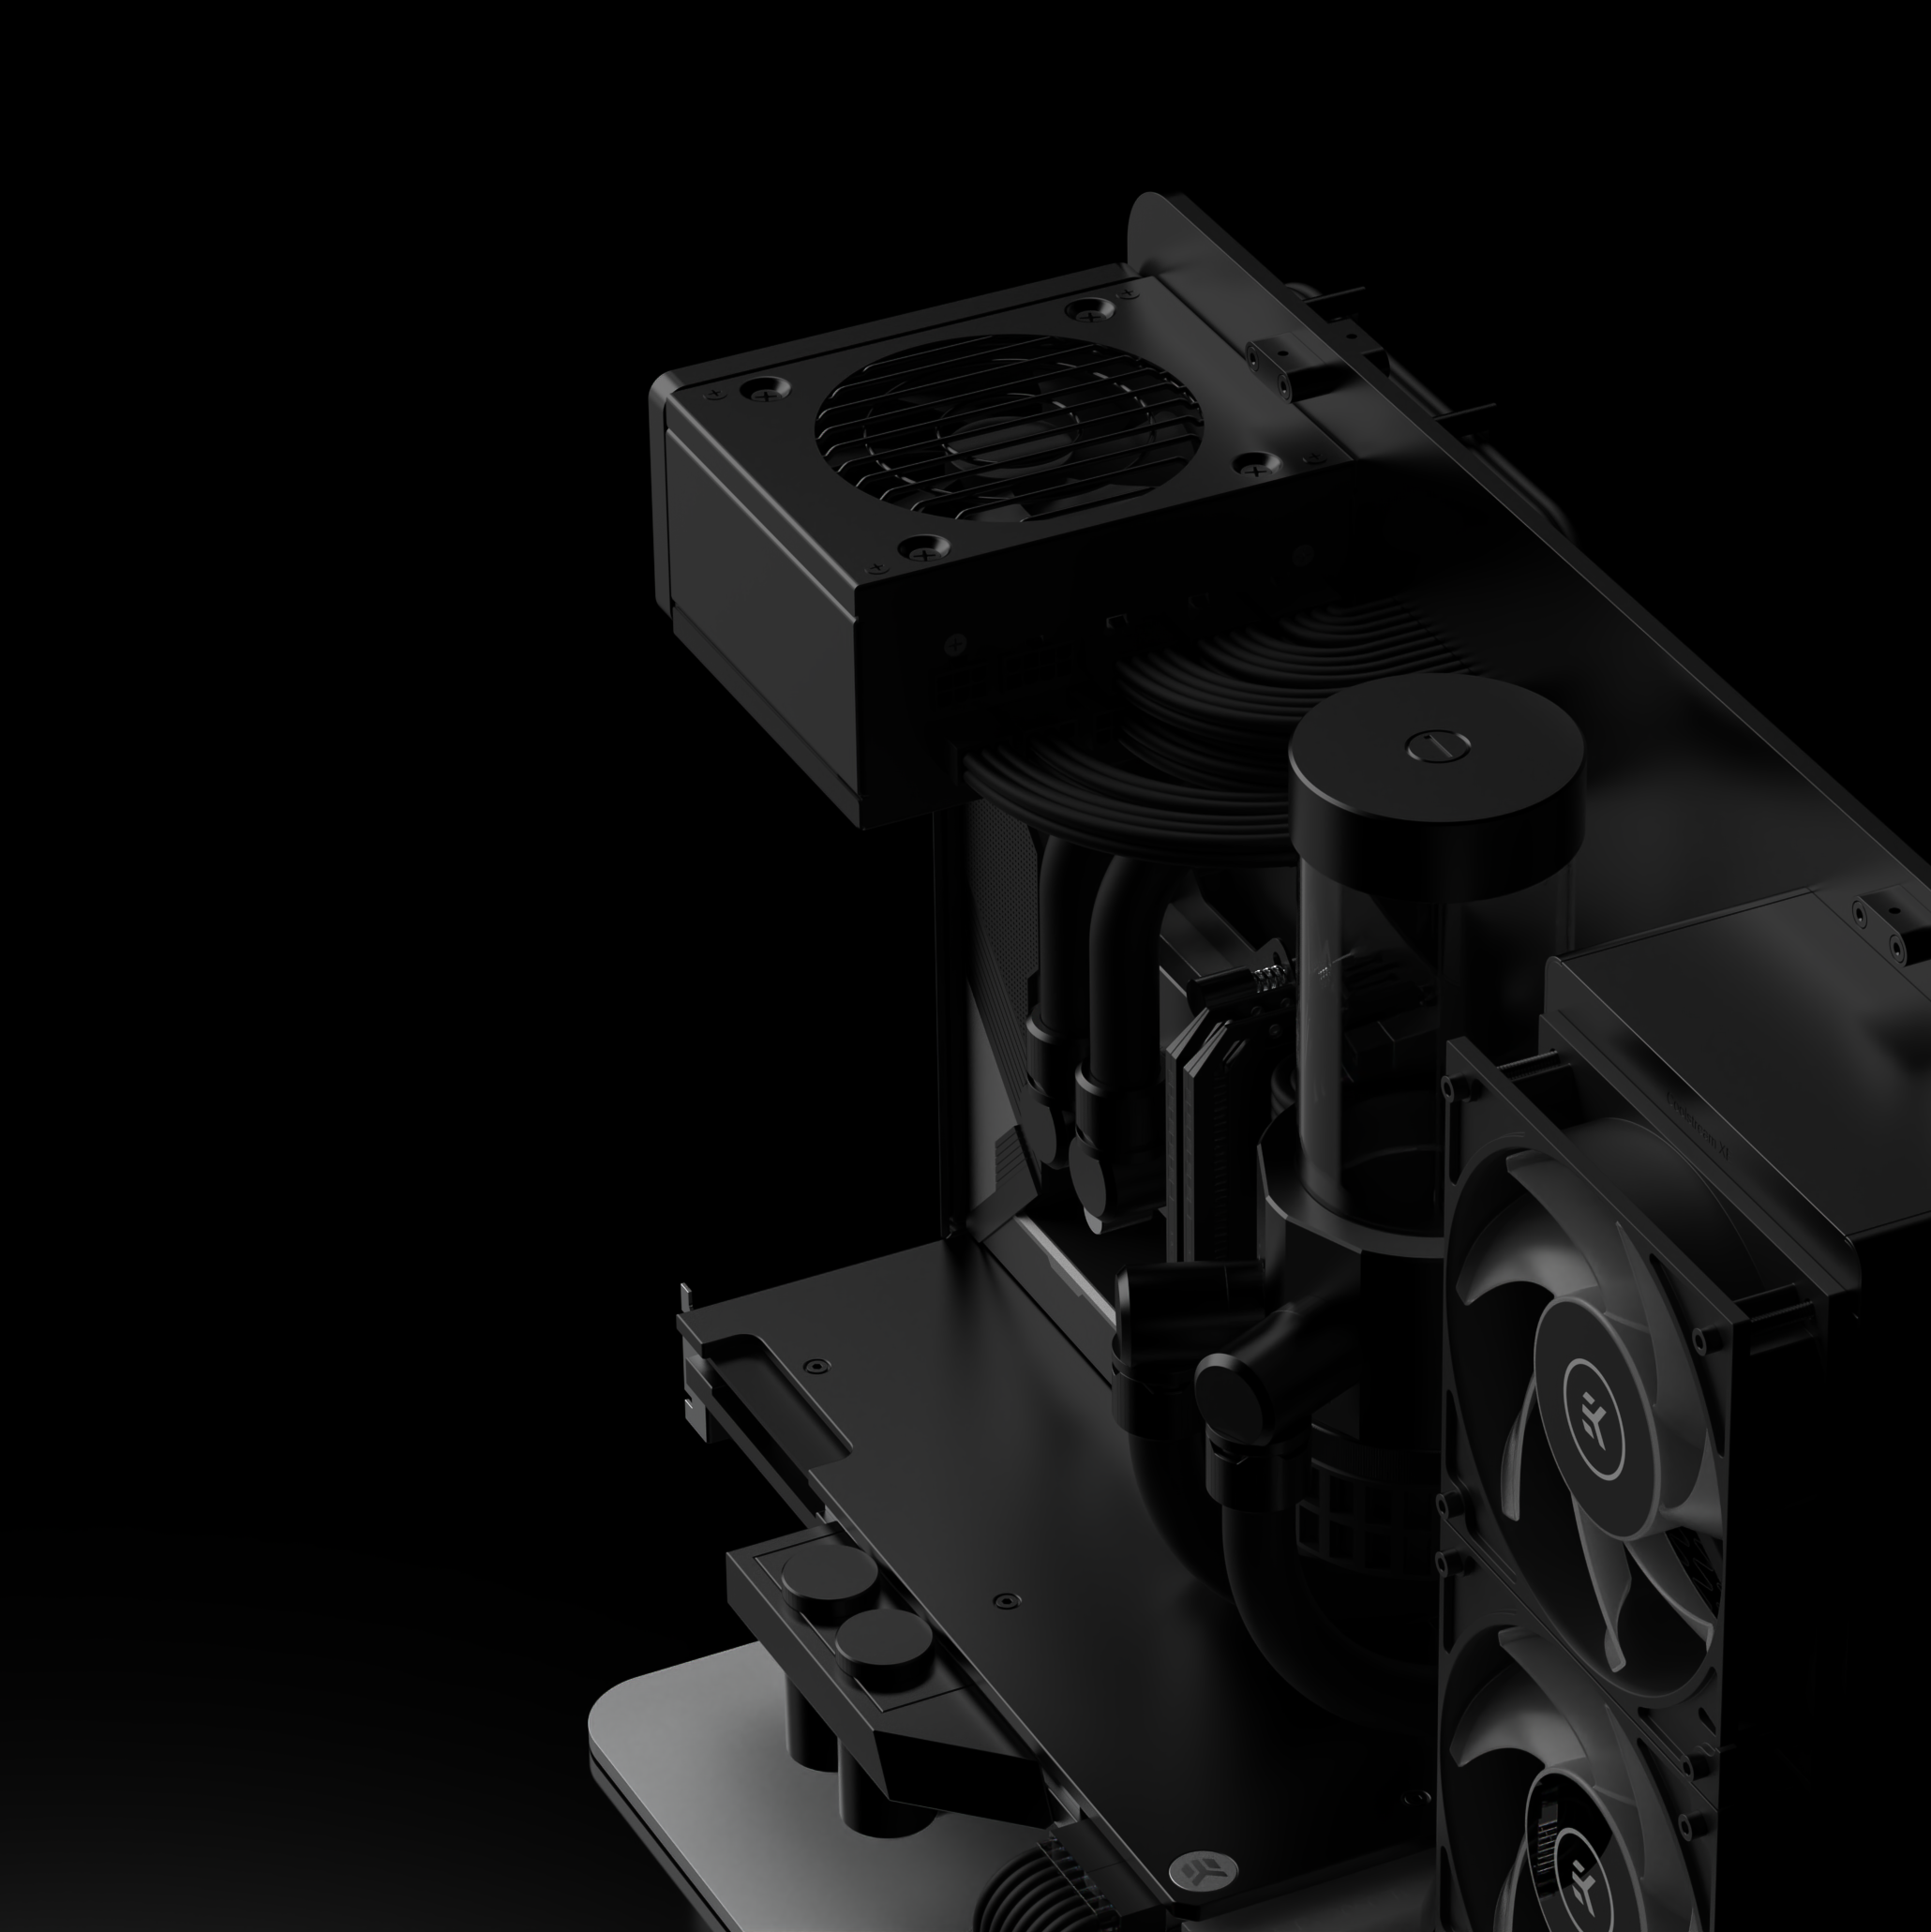
The chassis has a five-piece construction and utilizes a single aluminium sheet (mainplate) to mount all components. The mainplate is bent towards its base and connects to a robust aluminium stand. The left and main side of the chassis houses all major components, while the opposite side houses most cables, tubing, and a control hub for fans and lighting.
The chassis is enclosed by two aluminium shells with dedicated ventilation areas at the top and bottom. Air is pulled into the main chamber and exhausted at the rear. There are filters on both intake areas to prevent dust build-up which are fitted with magnets to allow for easy maintenance.
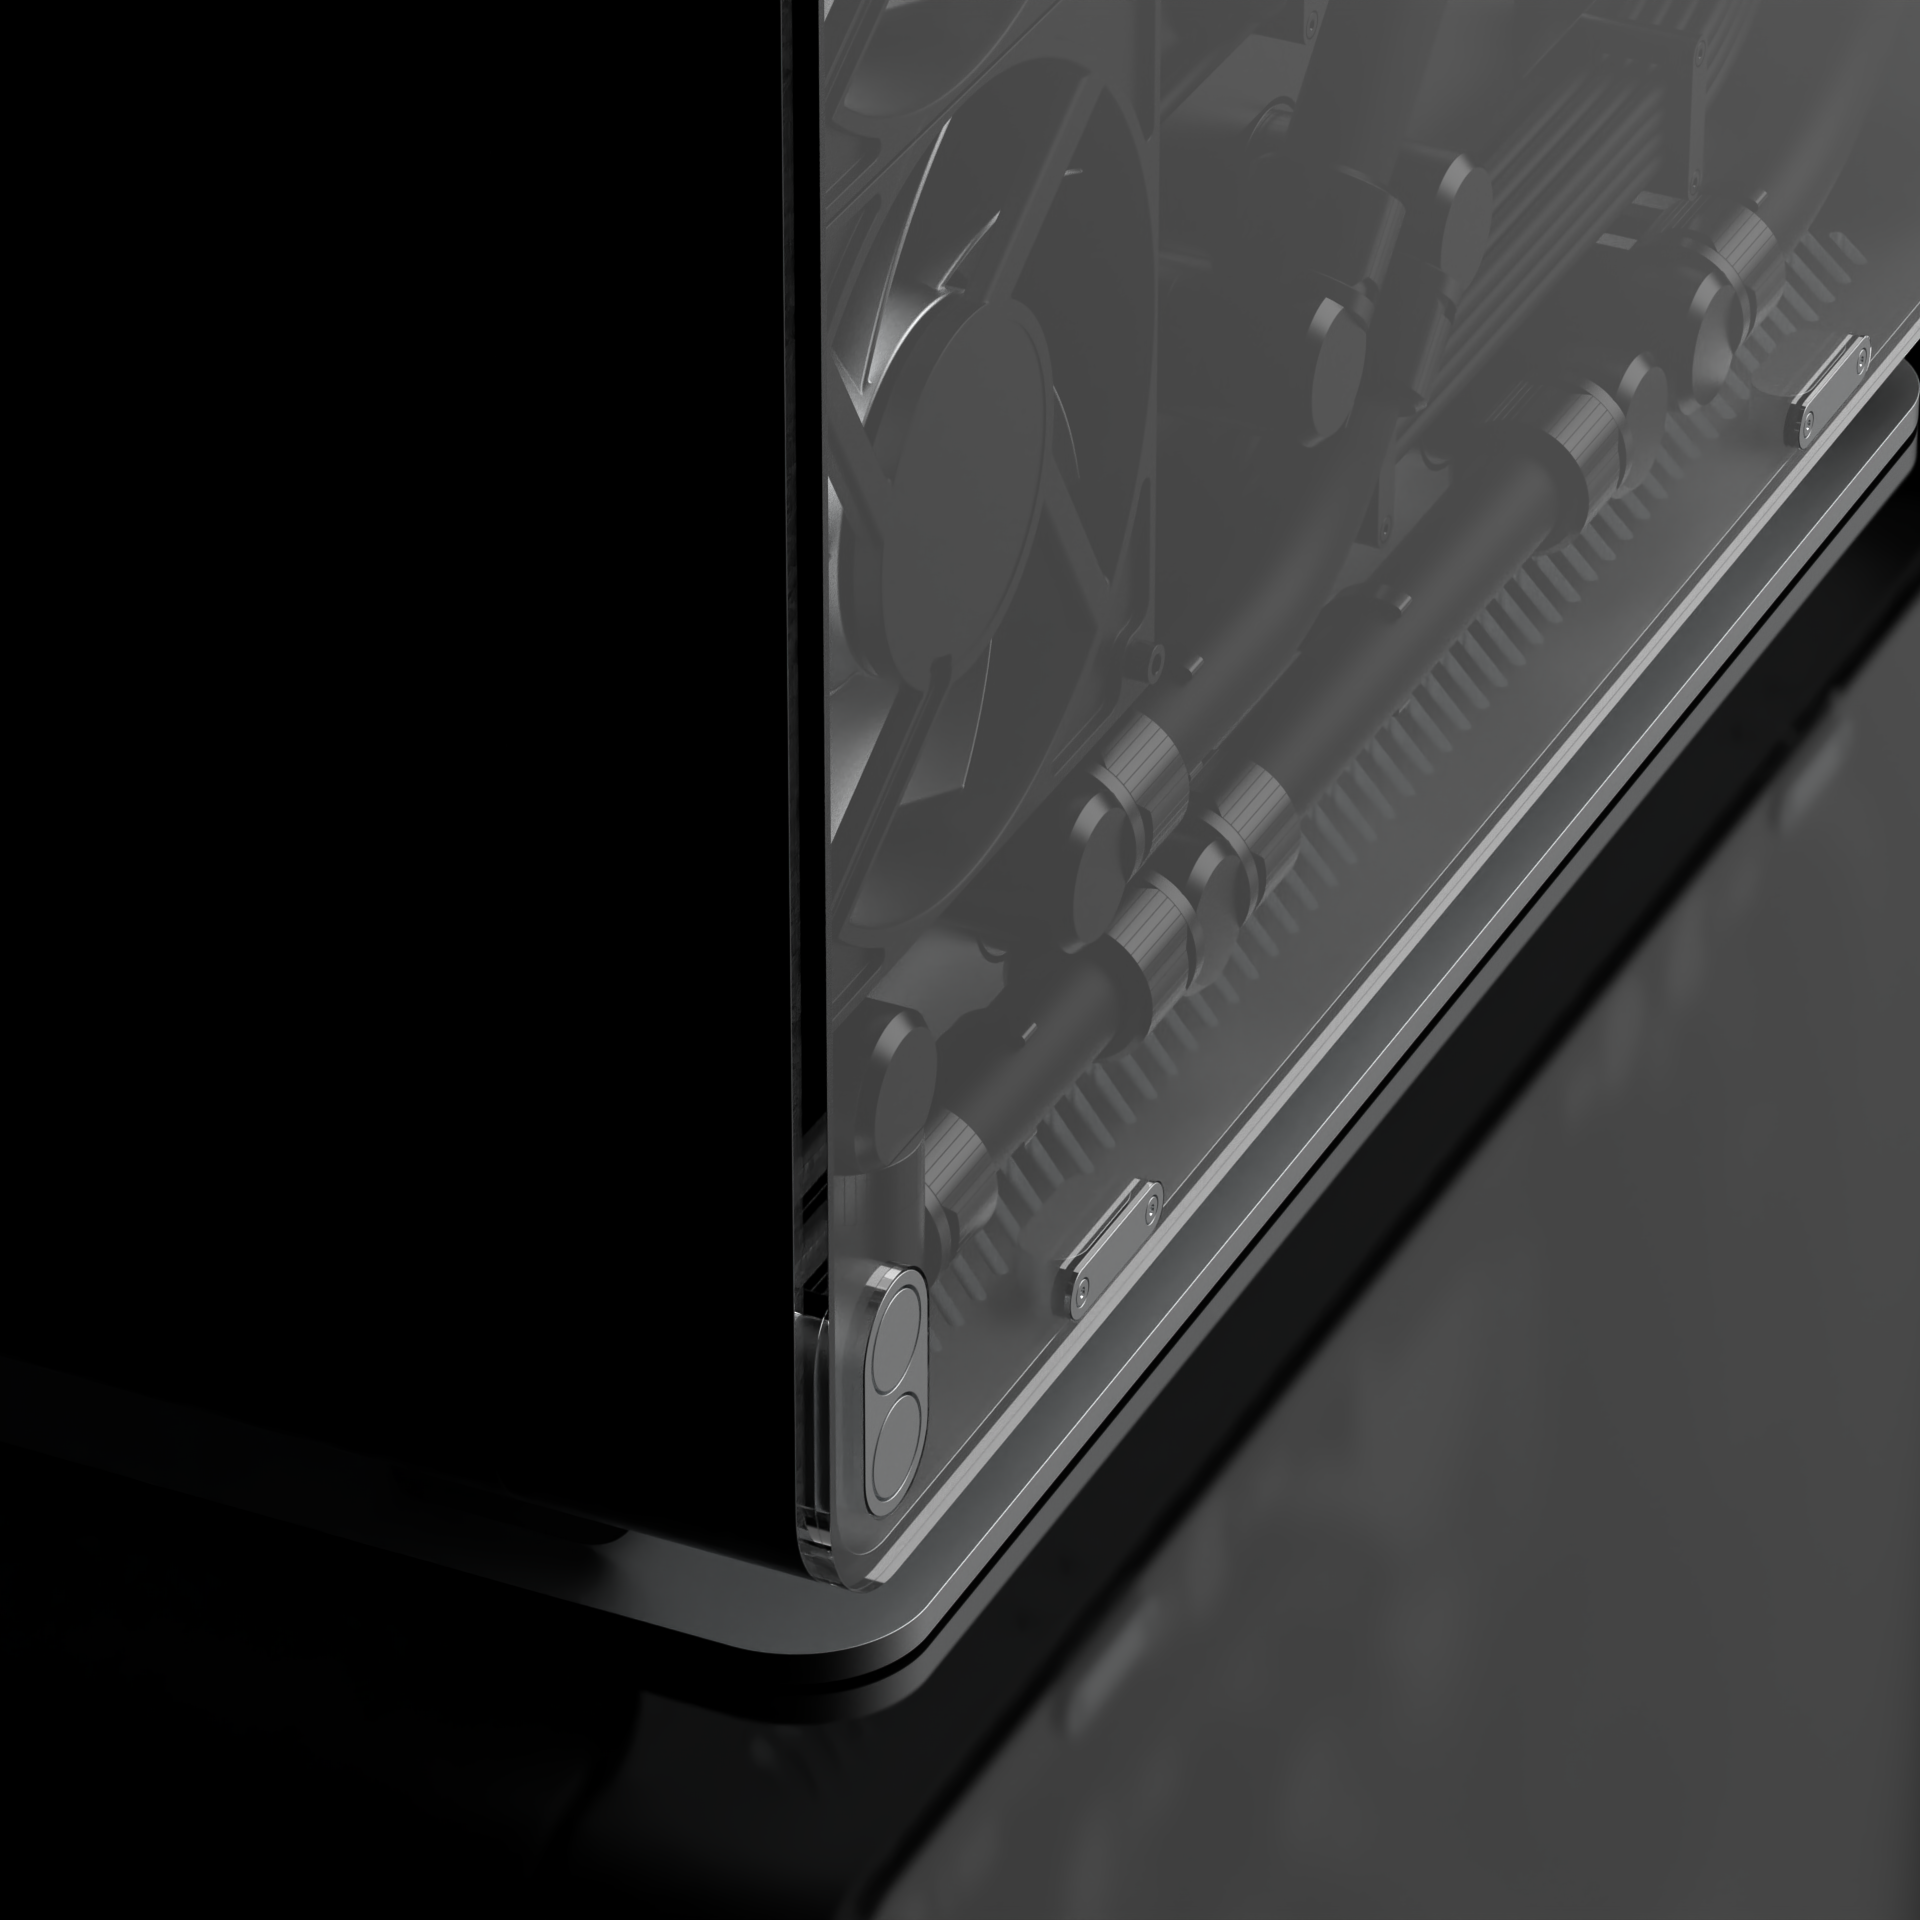
Both sides of the chassis have transparent acrylic panels to showcase the internal components. These panels are also fitted using magnets.
Now, let's have a look at the component specification for this build. Don't worry, we'll go into further detail on the design below.
Component Breakdown
Now some of you are probably thinking, why use outdated components such as the 2080 Ti, 3900X, and DDR4 memory? It's a valid point, and I wouldn't mind using the latest tech given that it's fully water-cooled.
However, this project began way back in 2017 while I was still in university, and I purchased many components during a sale in late 2019 thinking I would launch this project in early 2020. Since then, a lot has happened and I've finally found the time to proceed with this project.
I won't go into detail on each and every component but I'll dive into one of deciding factors for my selection: to reduce size. Consequentially, the selection of e.g. motherboards is very limited. I have chosen a mini-ITX motherboard, which is the smallest form factor, and equally important; one that has two M.2 slots. This saves tons of space and reduces the number of cables involved (as compared to using 2.5'/3.5' drives).
I have also chosen an EVGA-brand graphics card for the same reason. EVGA has always offered compact high-end graphic cards and this model is roughly 30% smaller than equivalent models from other brands. The same reasoning applies to the power supply, which is a 'small form factor' version (SFX) from Corsair.
The PC will be used for both GPU and CPU intensive tasks which is why I've chosen to use high-performance components such as the 2080 Ti and 5900X. Speaking of performance, let's take a look at the selection of liquid-cooling components.
Liquid Cooling Breakdown
I'm sure you're noticing a theme in the selection of liquid cooling components, they're all products from EKWB, and no, I'm not sponsored (unfortunately).
Either way, I have followed EKWB's development of liquid cooling solutions for a long time and I've always found their design language to be compelling, especially the Quantum/Vector series.
Obviously there are other brands that also make liquid cooling products, but I think what distinguishes EKWB from the crowd is the scale of their solutions. EWKB have always been consistent with their design language across their products, which makes their products fit very well together.
The main choice I've made for this build is to use black components with integrated lighting. While I can't say that I'm a fan of making computers look like a jar of skittles, I think internal lighting can look good if done right.
I have also chosen to use soft tubing for this build, even though the tube routing is very simple. I think the matte black ZMT tubes look really neat, and I have never liquid cooled a PC before, so I thought It'd be smart to save hard tubing for a future occasion.
Enough about liquid-cooling, let's rewind and take a closer look at the chassis design.
01
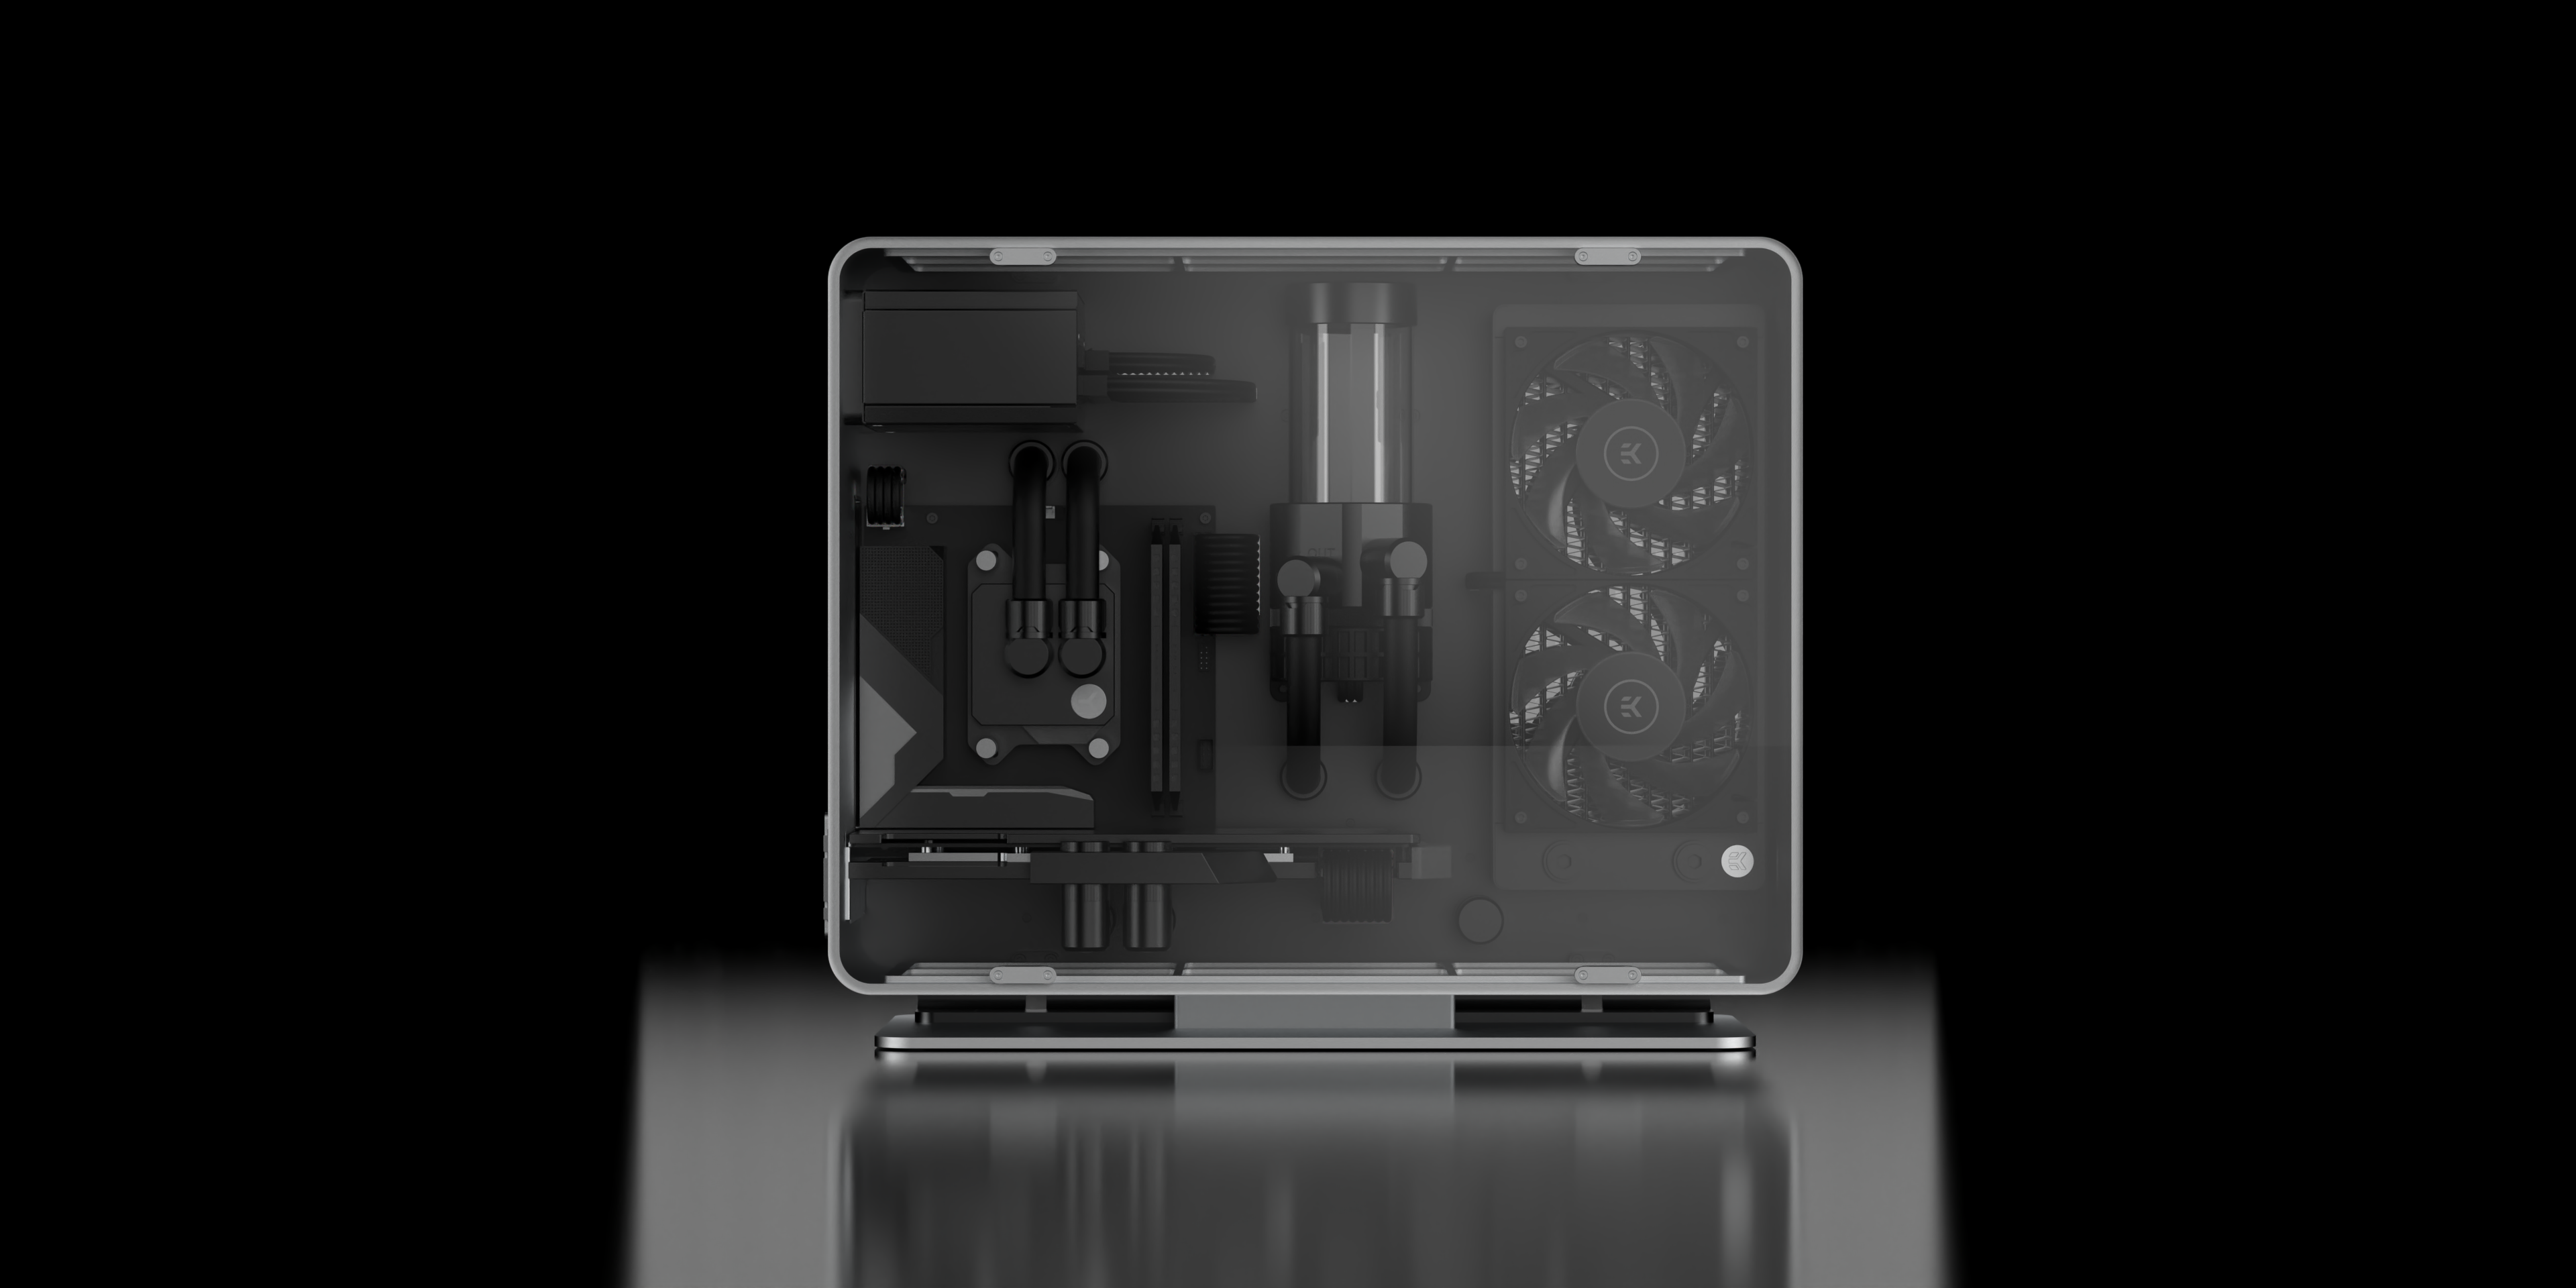
Main Chamber
Rear Chamber
Cooling Loop
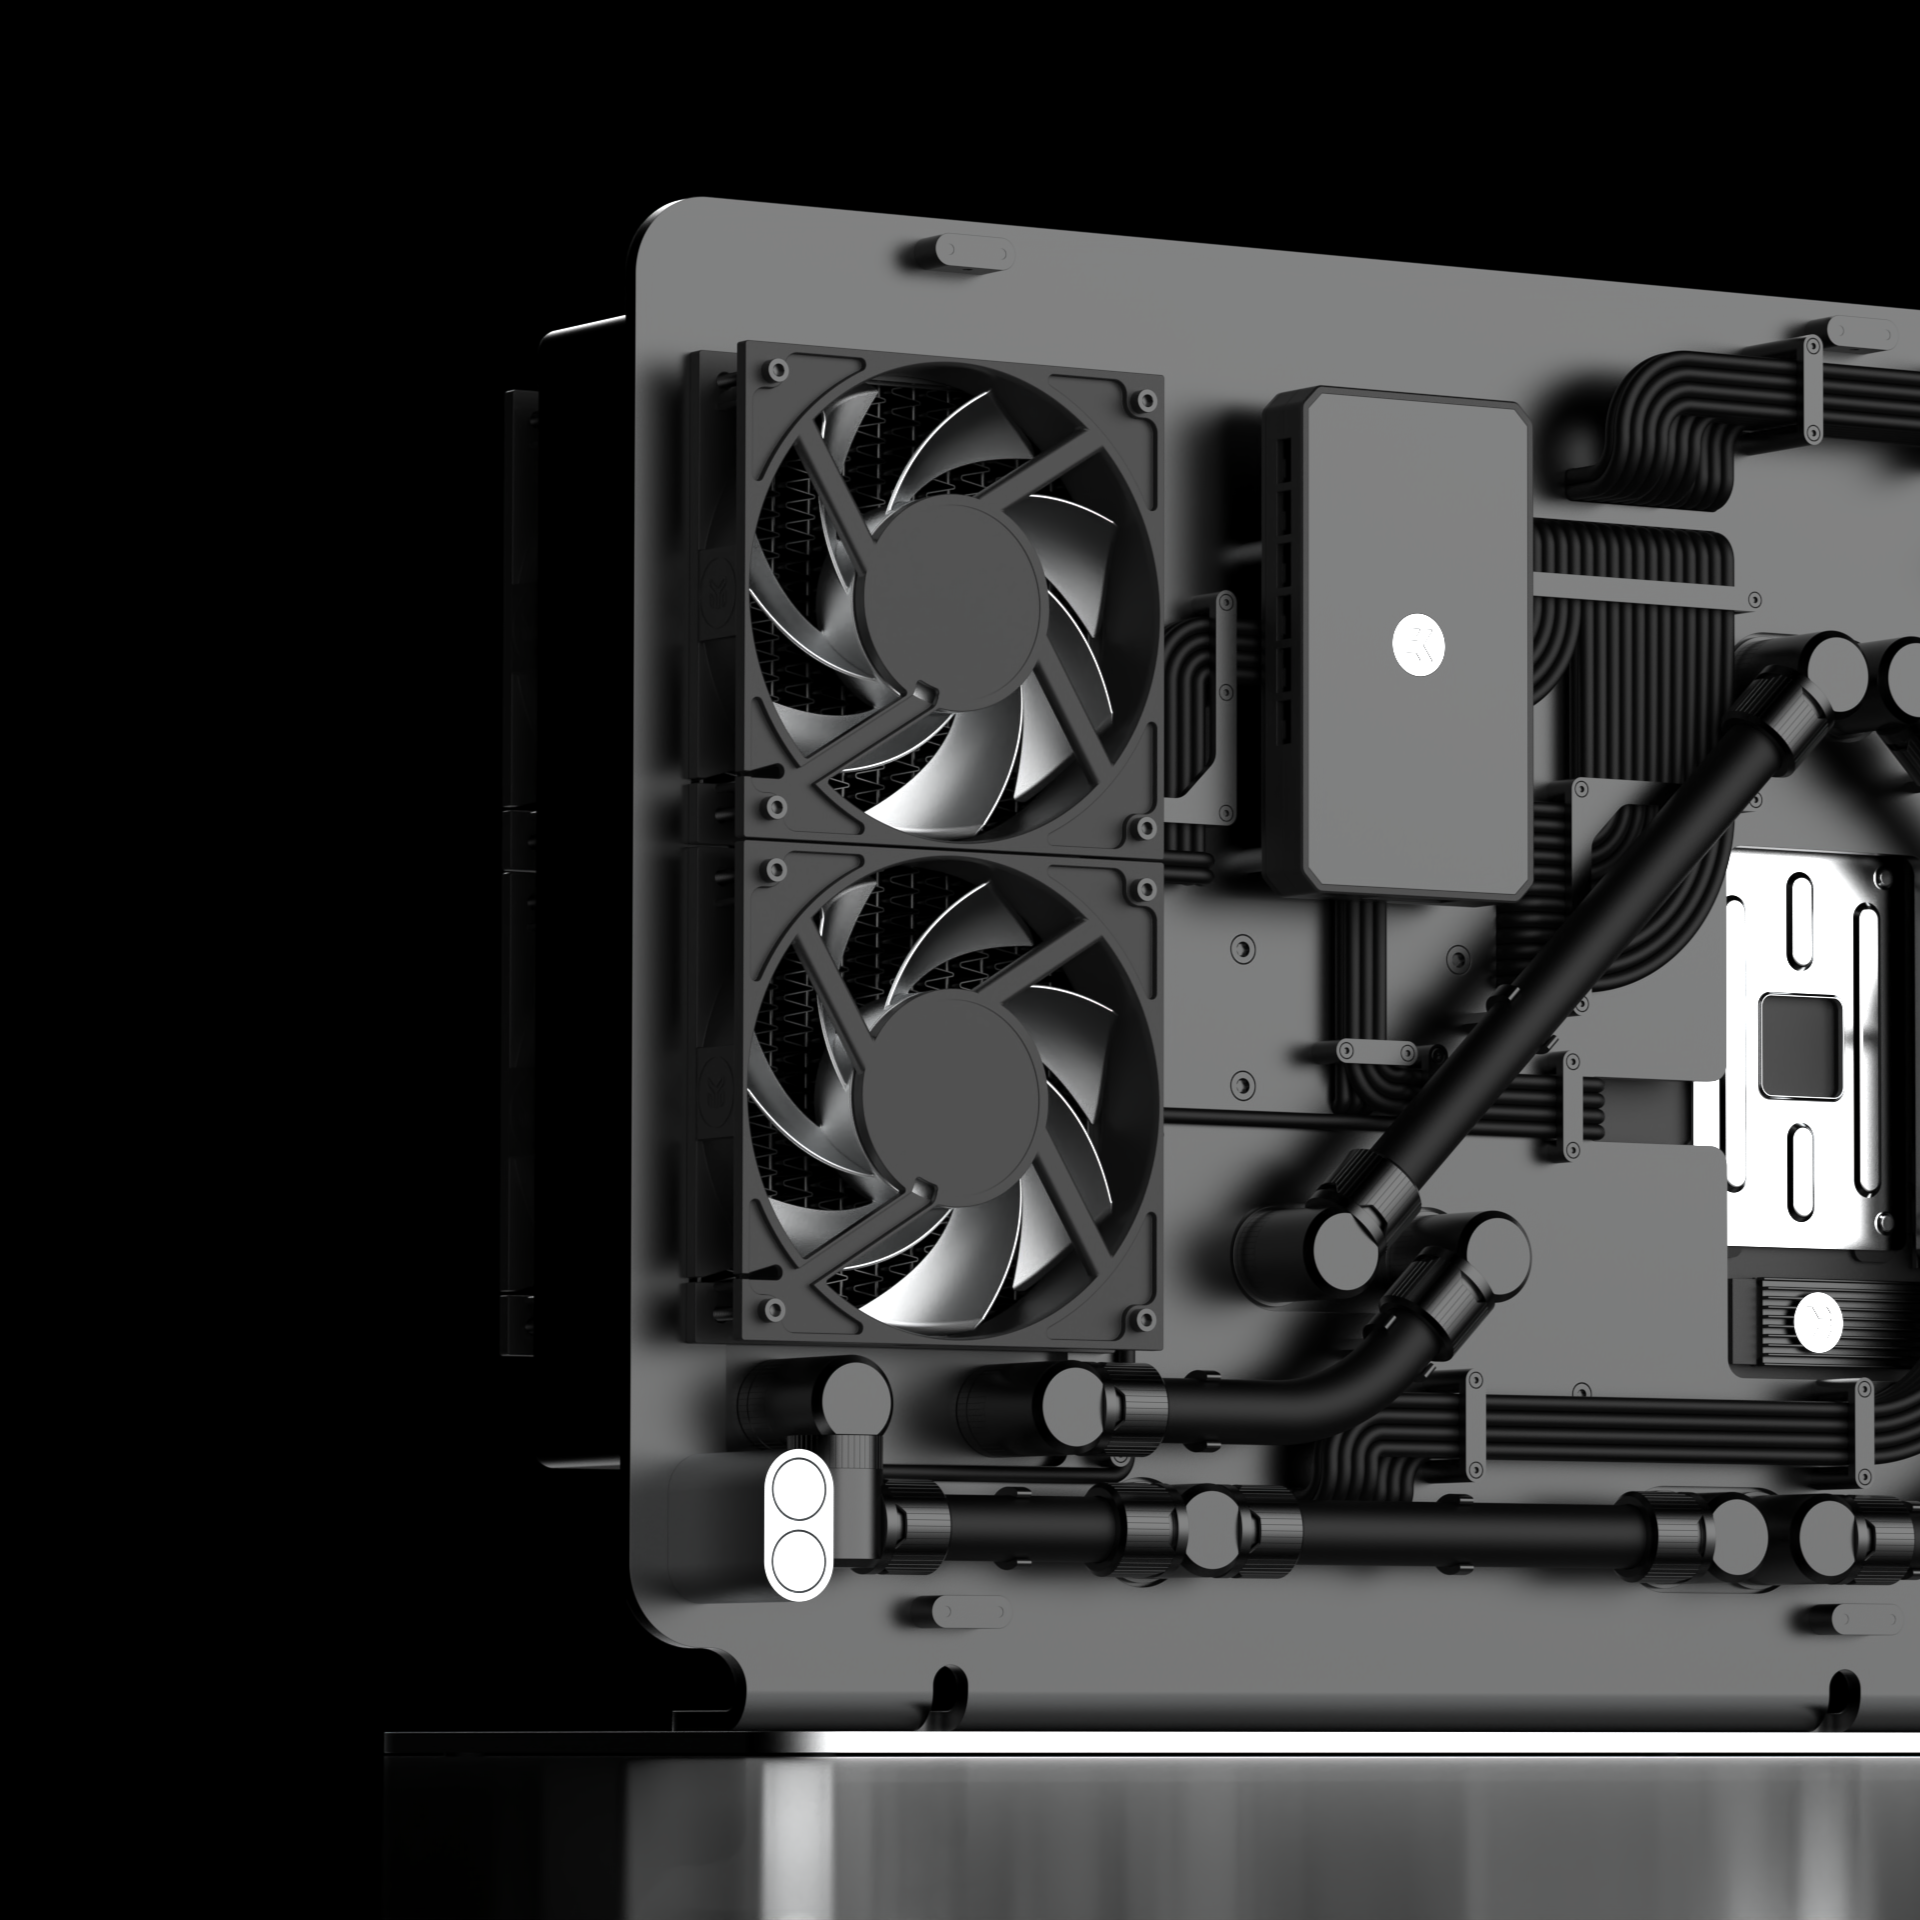
The main chamber houses all essential components: the motherboard, processor, internal memory, graphics card, power supply, as well as the reservoir-pump combo unit, and the radiator and two of the fans. Cables and liquid cooling is routed into the rear chamber, allowing for a neat and tidy space.
Every component is positioned with sufficient spacing to its surroundings, allowing it to appear harmonious rather than crowded.
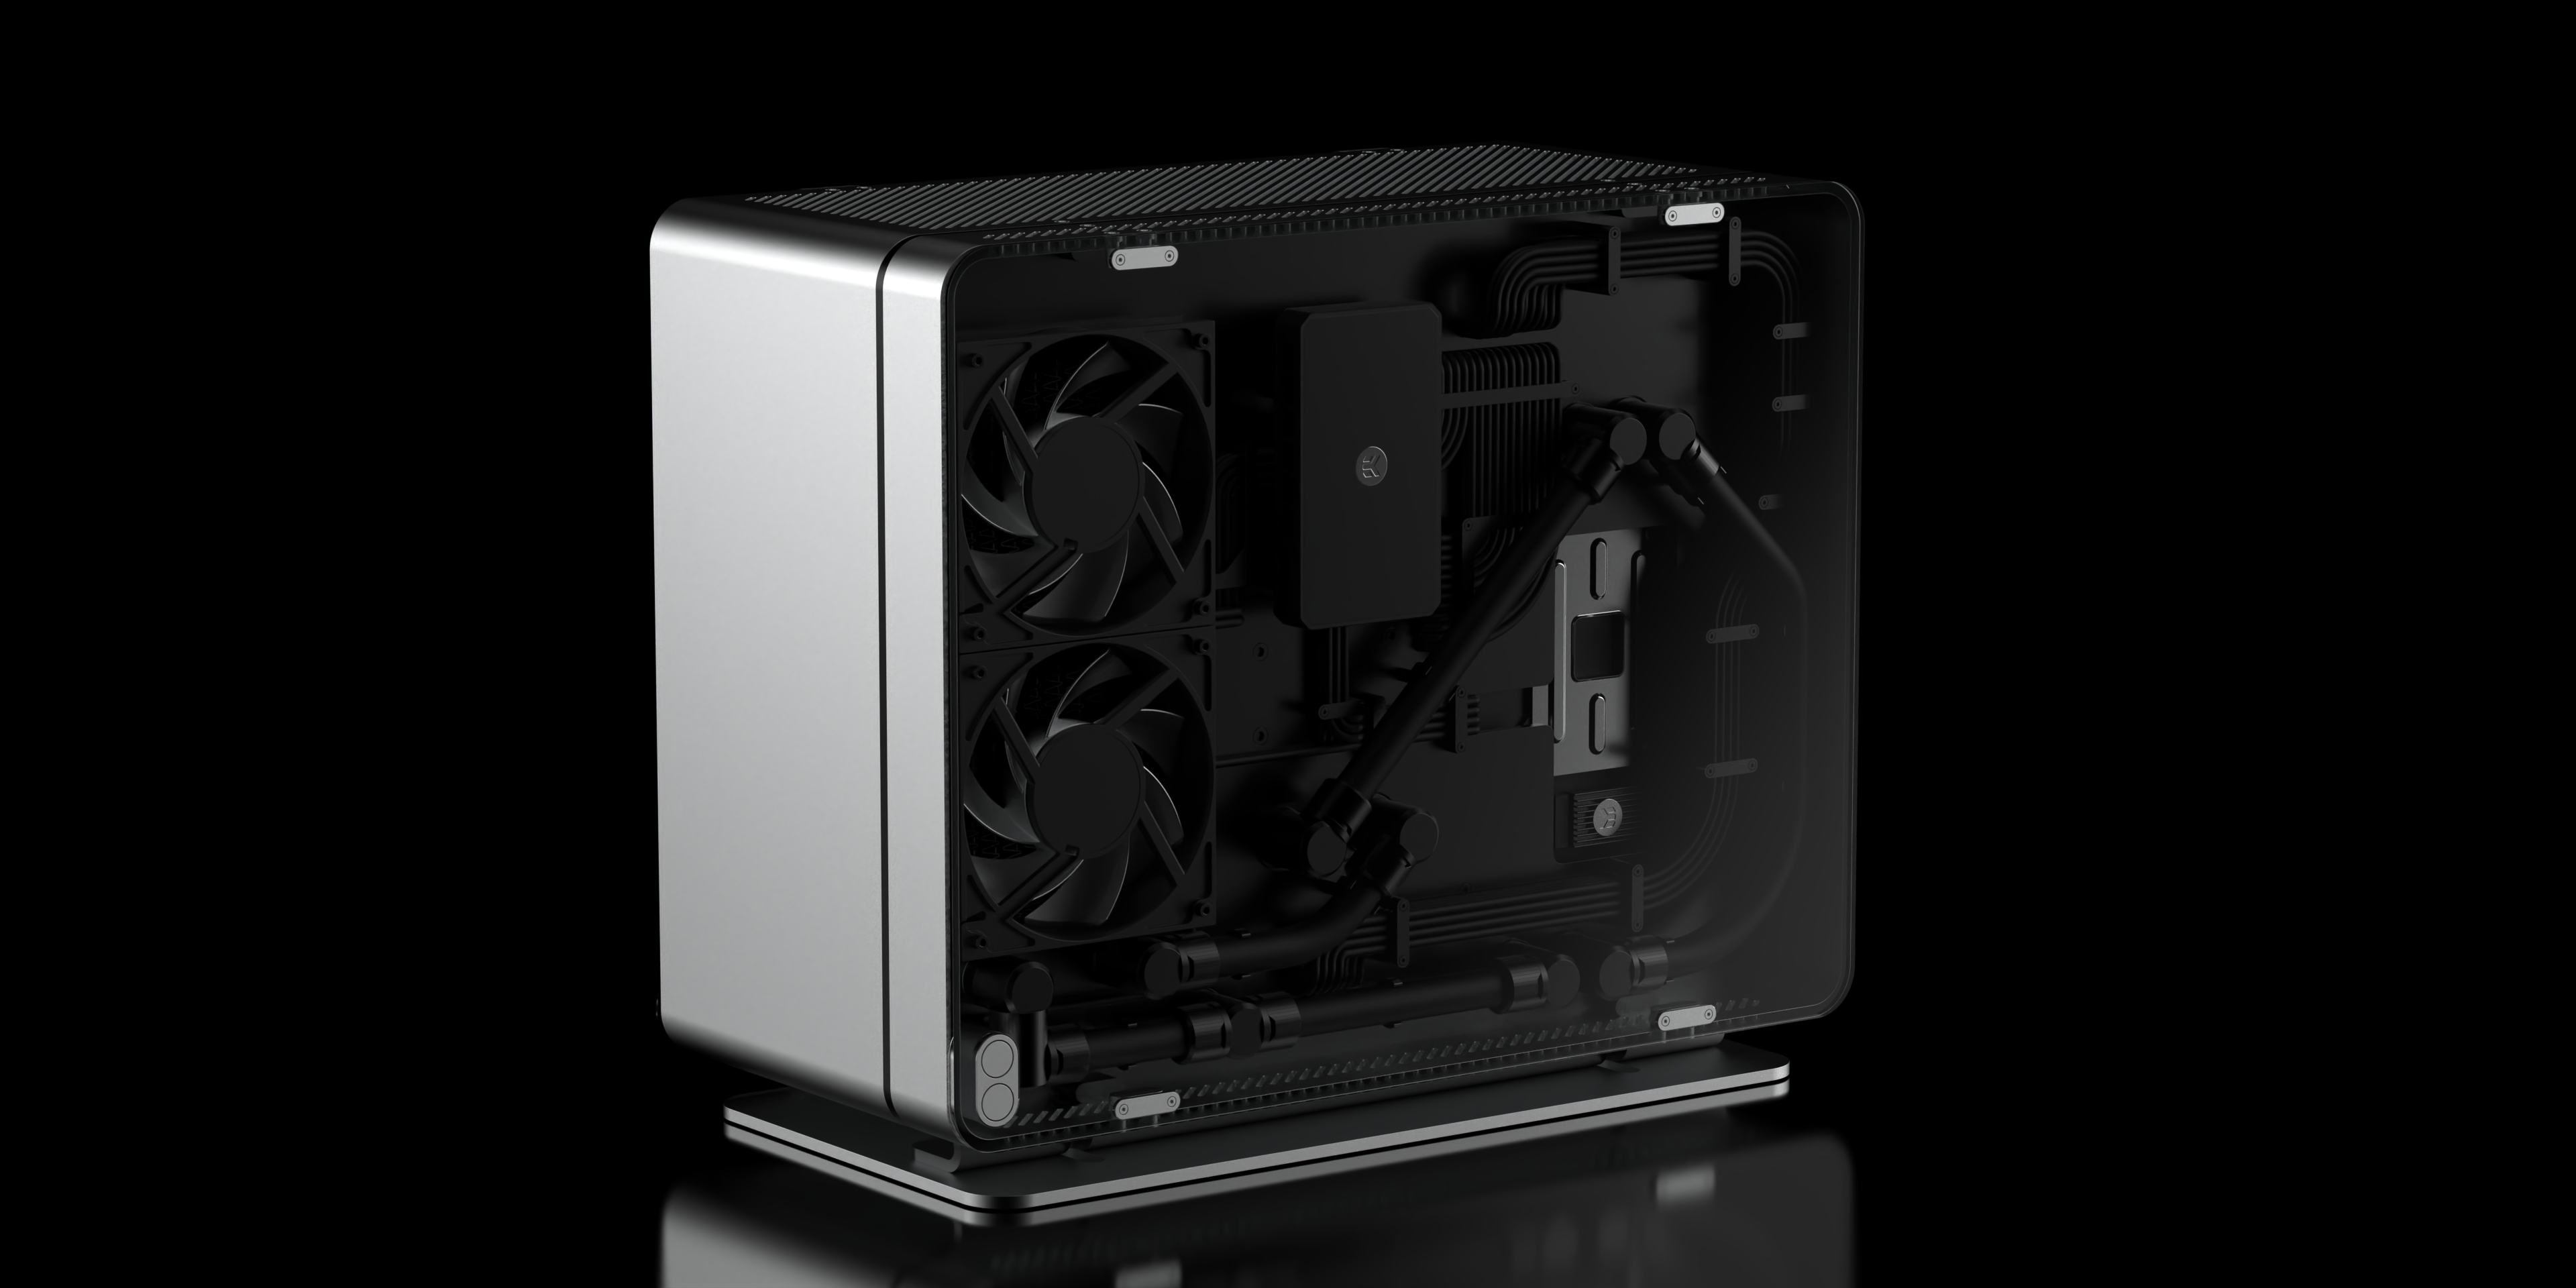
The rear chamber is primarily used as a routing space for cables and liquid cooling. It has a well though-out layout that is designed to showcase the sleeved cables, fittings, and tubing, but also houses two fans which pull air through the radiator.
Both the cables and the tubing are equipped with 'routers' that locks them in position and keeps them organized. A control hub, the EK Loop Connect is also housed in this chamber, allowinging all fans and RGB lighting to be connected in one place, and conveniently to be controlled by one software.
Description 3
As a closing note, here are the current chassis specifications and a peak at the content you can expect to see moving forward. Hope to see you again!
Sincerely,
Niklas
Chassis Specifications
What's Next?
002: Design Loop A
March 31, 2023
This post will be unveiled on Saturday, Jan 21 at 15:00 CET / 09:00 EST / 06:00 PST
Build log announcements are always posted on Instagram